Derwent Artbars: a luscious new product from Derwent, water soluble waxy crayons

detail from step by step
Well ..... secret project is secret no more : > )
Derwent Artbars
Last summer I was asked to take part in testing Derwent's newest baby - Artbars, then in the lab under development. They will be available in the next couple of weeks and are now on the Derwent website.

Rocks near Porthgwarra, Derwent Artbars, on A2 cartridge paper, Vivien Blackburn
It was really interesting being involved in trying them out from the short-stumps-of-colour-and-varied-composition/shape etc at the beginning and following their progression. I still have a little container of these stumps.
In this one, that they commissioned after the initial testing, the only other medium used is a little white gouache for those areas where I didn't retain the white of the paper for the incoming waves. In other places it is simply the white paper.
In the one above, I was wanting to build an intensity of colour, unlike the sketchier, airier version below. Artbars worked equally well either way.
The colour is lush.
It's possible to use a wide variety of techniques with Artbars
- Draw on dry paper. Scumbling colours over each other, dry, then washing loosely with water, being careful not to over mix or overwork, and keeping the underlying graphic marks in places, contrasting with the really fluid washes with no marks, gave some really nice textures and colours.
.
- Draw into a damp wash for softer marks that blur into the surrounding colour a little.
.
- Drawing back over dry washes and leaving the fuzzier, quite different marks showing, where appropriate, adds variety and texture.
.
- Lifting colour from the sticks for fluid washes with no ‘drawn’ marks is very effective and gives luscious washes of colour. It's possible to achieve very pale translucent washes as well as intense colours.
.
- Splatter colour by picking up from the crayons with a wet brush
.
- Glaze layers over earlier dried layers for veils of changing colour
.
- Dry drawn marks in final layer, leave as graphic marks
.
- Use those fine triangular edges for linear marks (the shape also means they don't roll of your desk or roll away when you work plein air)
.
- Where I had only used dry colour or not built up too much wetted dark to sink in and stain the paper, a battery operated eraser worked well to remove colour and ‘draw’ back into areas.
.

- Printing - I scribbled onto acetate and then ran a small foam roller across it – then ran this across paper. I’ve previously done this with watercolour and it worked well with the Artbars. Scribbled marks on acetate were simple rolled over with the sponge and then printed onto the paper by rolling the sponge down the page. Ideal for underpainting marks in rocks, bark, stone walls etc They can be blotted whilst damp, to remove parts. Then use any of the techniques above to work into it, defining, removing, simplifying. Variations on stencilling and printing can be experimented with. Example on the left above.
. - Spraying techniques using the spray bottle in the accessories
.
- Building heavy layers of colour and scratching through to reveal lower layers or the white of the paper
.
- Building heavy layers of colour and burnishing to a glossy smooth finish
.
- Scraping flecks of colour into wet washes to create interesting speckles and texture
- Scraping through thickly applied layers of colour, to reveal a the colour of a layer below.
.
- Using Derwent's embossing tools through a wet wash - it dents the paper surface, creating a fine line of more intense colour as the pigment dries.

There is a range of accessories with spray bottles and scrapers to add even further techniques - see on the Derwent site, to add to the range of techniques. I find spray bottles very useful with water media and often scrape fragments of pigment from pencils to add texture, letting them fall into a damp wash, which fixes them.
Artbars also worked well with Derwent's waterbrushes - I was absolutely amazed at how these self'-clean. You know how you have to wash a brush thoroughly before picking up another colour - I don't know how these clean so easily, but they do. (I'm sold on them for times when I wouldn't want to be carrying quantities of water They are ideal when you only want to carry a sketchbook, watersoluble graphite and a brushpen for instance - a minimal kit but really expressive). Taking Artbars out plein air I'd want water and bigger brushes to enable me to work fast and freely on a largish scale but for small studies the waterbrushes worked well.

detail 1 from a quicker sketch showing glazes, dry marks, washes, splattering, scratching .....

detail 2 from a quicker sketch showing glazes, dry marks, washes, splattering, scratching .....

the whole of the quicker sketch
One of the things I asked for was a range of subtle light colours, as well as a good range of more vivid colour. This should enable images from the very subtle to intense and vivid and they certainly seem to have listened : > )
Artbars colour range
Here I've deliberately used the Artbars alone apart from a touch of white gouache in surf as I was testing them.
Artbars colour range


This earlier still life done with a limited range of the early Artbars was one of the intense variety I think
: >)

Still life experiment on A2, Vivien
I like the mix of drawing vs the painterly marks they can make, the flood of colour achievable and the soft subtle washes that can be obtained despite their richness.
They worked well on both cartridge paper and watercolour paper - the watercolour paper allowing more changes and pushing the colour about/lifting it off etc without the paper becoming damaged, though I preferred a smooth surface to work on and would use hot pressed watercolour paper. I like the marks to be ones I've chosen to create, rather than those imposed by the paper.
.
It's possible to combine them with any coloured pencils, water soluble pencils/graphite, ink or watercolours to extend mark making possbilities even further. My next project is to combine them with Inktense/Coloursofts/Derwents Artist and Studio pencils/watercolour pencils/watersoluble graphite - possibilities are endless : > )

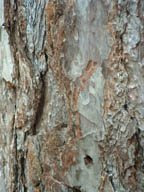
For anyone who is a member of the SAA, I was requested to do an article for the SAA magazine about Artbars, (out in March, for those who are members). There is a step by step birch tree showing some of the above techniques in practice.
My paintings have been featured in a glossy magazine but I've never written an article - so be kind and make allowances!
My paintings have been featured in a glossy magazine but I've never written an article - so be kind and make allowances!
So - these are going to be something I enjoy using, free an expressive and fun. I'll add further work here or links to longer posts about using the Artbars in work as I go.
Edit April 2012 - further work:

Go to the searchbox and enter Artbars and it will come up with more work and comments :>)
......... and an update - you can read more about this one here

and
 A search on Artbars or Derwent on my blog will bring up more work.

......... and an update - you can read more about this one here
and


Comments
Congratulations!!!
Sadly I have an endless love of play and a bad organisational work ethic!
Lindsay I'm really enjoying the recent work you've been showing on your blog. The project is going well. Of course I knew it would :>)
Your range is always so inspiring!
Laura they are very different from the media you normally use - I think you'd enjoy experimenting. I like using them A3/A2 size best so that there is room for gestural marks with the thicker mark. The combination of drawing/painting within one medium would appeal to you I think.