scanner vs photograph Part 2 using a camera - the difficulty of copying coloured pencils in moleskine sketchbook and some solutions
 Final stage - using levels and colour balance to regain warmth and correct tonal values
So - today is showing how I adjust the photograph in the same way as I did the scan and showing the stages.
I won't repeat the stages (see yesterday's post) but the effects of scans and photos are a bit different - sometimes I like one better, sometimes the other.
The warmth was put back into the image again using colour balance and the tonal values sorted out with Levels. (see yesterday's post)
 stage 2 duplicating layers
A bit too dark in parts but this will be adjusted in levels and using the colour balance in the final version above. This has put back the darks and the pale colour in the sky that had been lost.
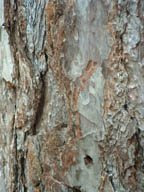
 stage 1 - an untouched photograph taken in dull natural light
Much too pale and the paper much to cold and white, not the creamy colour of moleskine. I suppose I could take time to reset the white balance on the camera - but haven't actually investigated how to do that, other than glancing at the instructions! All the pale colours in the sky are lost and the darkness lost.
Hope this was helpful.
In the comments section yesterday Niels gave an excellent piece of advice
As I am also a photographer I do understand the problem with capturing your images digitally and having them display as you originally saw them.
The first problem we have is that no matter what lightning we are using (tungsten, incandescent , florescent or other) our eyes will always convert any white tint created with high-lighting to pure white.
Our camera tries to do this and this is why we ave light settings or cloudy, sunny, etc to compensate.
The other problem most people have is that they take their images in Jpeg, which set the White Balance (WB) at capture and for many cameras it also tends to make the colours more vivid.
I always recommend to use camera RAW if available or pick the best camera WB settings.
The scanner is an identical device as the digital camera except in a different case and different focusing abilities.
The scanner will for the most part perform better. With pastels if it is not all fixed will leave residue on the scanner glass.
Most plain white papers actually has a blue tint (optical brighteners) so using that in the image to set WB will produce warmer image (blue shifted to red end).
If you want better WB then use a photographic grey card at side of image and use this to set WB and crop for effect.
Also most people ahve the screen set way too bright (blue) changing your screen to a Wb of about 6,000k will produce images that seem more normal.
Please feel free to contact me with any camera or editing question.
Niels Henriksen


Comments
Ronell
Did you make your own or buy one ?